
Do It At Home: Meat Stocks and Bone Broths
Broths are so easy to make for yourself at home, yet they are commonly one of the top things home cooks outsource at the grocery stores. Making your own broth has numerous health benefits, and is also budget friendly.
If you are a mom/homemaker, you are likely always on the search for ways to create an abundance of nourishing food for as little cost as possible. Keep reading to see how a little switch in your routine can do just that! With just a little bit of planning and hands on work, you can have an abundance of broths and stocks for those cozy winter soups, stews, and chilis provided to your family with your own hands.
In this post, I will give you the basic information that you need to get started doing this yourself. There is so much information out there for you to research this further, exploring the health benefits and the various methods that people use to enhance these dishes. My goal here is to keep this as uncomplicated and straightforward as possible, for the mom who just want to get it done.
Meat Stock:
A more time efficient option than the bone broths, is a basic meat stock. These can also be easier on the digestive system than their nutrient dense counterpart while still having similar nutritional benefits. All you realistically need to pull this off is some type of meat or bone that you can boil. However, there are many ways that people spruce up this homemade staple.
Type of meat to use->
You can use any meat trimmings to make a homemade broth. I commonly use chicken carcasses leftover from a roasted chicken dinner. You can also make a simple broth from boiling a whole raw chicken, and then use the cooked meat in chicken and rice, chicken noodle soup, chicken chili, or all of the above!
Other sources for making a great meat stock include: Bone in skin on chicken thighs, chicken wings, chicken breasts (chicken broths), stew meat, beef shanks, short ribs (beef broths), and pork chops, ham bones, Leftovers from bone in roasts(pork stocks), and the list goes on.
Optional Add-ins->
You can add really any seasonings or additions that float your boat. Here is a list of common additions that greatly enhance the flavor:
- Salt
- Chopped onions
- Chopped garlic cloves or garlic powder
- Lemons
- A splash of apple cider vinegar
- Basil, oregano, thyme, rosemary, and/or parsley
- Bay leaf
- Carrot cut offs
- Celery cut offs
Steps for meat stocks:
- Place the type of meat you are using into a stock pot or a croc pot and fill with water so that it is completely covered.
- Add in what you have chosen for additions to enhance the flavor.
- Bring the water to a boil and let simmer for 2-4 hours in a stock pot on the stove, or for 5-6 hours in a crock pot.
- When completed remove from heat and let it cool for 15 minutes or longer to make handling and straining easier.
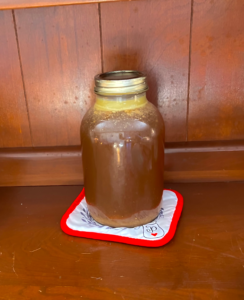
- Strain the broth into a bowl and transfer to your preferred storage method. I like to use jars in my fridge. However, this also freezes very well if you use a freezer safe container!
Helpful tips:
Using leftover meat cut offs or bones with trimmings on them is best practice. You can boil them long enough to get the added health benefits without overcooking meat that you intend to eat. Which is why chicken or even turkey is such a great option because it is a good use for those carcasses.
However, if using meat that you intend to eat like a whole chicken, you can bring it to a boil and then let simmer until it is cooked first. After this, allow it to cool and then pick the meat that you are going to use off of the bone. Return the bones and cartilage back into the pot and continue to simmer it for the remainder of the time.
Roasting or sauteing the meat scraps before boiling them can provide additional flavor to the broth.

Bone Broths
This nutrient dense staple is just about a winter necessity in my house now! I use it in just about everything: soups, stews, gravy, chili, cooking rice, boiling potatoes, or other vegetables to go with dinner. Some people even drink this as a daily nutrient boost. Bone broths are great for your immune system, for digestion, and for skin and hair health. This makes it a great winter staple not just because it is the base for an abundance of cozy comfort foods, but also because it fuels your body just the way it needs for those long winter months.
What to use:
Similar to the meat stocks, the only real thing that you need in order to make a good bone broth is the bones from whatever cuts of meat you like to cook with. My favorite type of bone broth to make is, once again, chicken bone broth using a leftover chicken carcass. However, you can also use beef bones and pork bones. A good source for these bones would be bone in roasts at the grocery store. Bake your roasts and save your bones for simmering into a bone broth.
Optional Add-ins:
The optional additions are the exact same as for your meat stocks. These additions just serve to enhance the flavor. You can keep it simple and just add salt, or you can experiment with a variety of flavors. Try adding salt, pepper, garlic, oregano, basil, thyme, or rosemary. Chop up an onion, and save vegetable ends from vegetables like carrots and celery. Splash in some apple cider vinegar, white vinegar, or lemon juice for a little zest. I’ve even put apples in it before.
Save my list that I gave under the directions for meat stocks above if you need some ideas to try!
Steps for bone broths:
- If using beef soup bones from a butcher, or uncooked meaty beef or pork bones, then roasting the bones on a cookie sheet in the oven first can help to create a more flavorful, and darker colored broth. This step is not necessary if you are using bones from a meat source which you have already roasted or cooked, such as chicken carcasses, or bone in roasts.
- Place the bones in a crock pot or a stock pot on the stove. I recommend using a crock pot as that is a more energy efficient and convenient option given the length of time it takes to simmer this broth.
- Add in any additions you want to flavor the broth with.
- Fill the pot with water until the bones are completely submerged and allow to simmer for 12-24 hours. The longer it simmers, the more minerals, collogen, and nutrients are extracted from the bones.
- When done, allow the broth to cool for at least 15 minutes to make pouring and handling easier. Strain the broth into a large bowl, and transfer to your preferred storage method.
Once your broths are completed, you can enjoy having an abundance of an ingredient that is handy to have no matter what style of meals you prefer.
Leave a Reply