If you are heading down the rabbit trail of eating whole foods, and cooking/ baking from scratch, the very first place I recommend starting is with whole wheat bread! If you are looking for a good beginner whole wheat bread recipe, look no further! I’ve taken that a step further and use fresh milled whole wheat flour which is what I recommend in this recipe. However, this same recipe can be made with store bought whole wheat flour. So don’t be shy, and try it anyway-even if you do not have a grain mill.
Tools needed
A bowl or stand mixer
Mixing spoon or spatula
Measuring cups and liquid measuring cup
Clean flat surface
Rolling pin
Bread pan
Making bread is not complicated! In all actuality, all you need is a little flour, a yeast, water, and salt. It may take practice to have the loaves come out just the way you want them to, but you can do it!
This simple sandwich loaf is by my opinion the best beginner whole wheat bread. As I tweaked this recipe over the course of a year, I have found it to be so forgiving and so easy.
The Process:
Here is a brief overview of the process, so you can know what is entailed. Mix the water and milk in a liquid measuring cup and warm to a lukewarm temperature; then add the yeast. Combine the yeast mixture with the honey in your stand mixer or a large bowl. Add the flour, salt, and butter, mixing them until it forms a shaggy dough. Knead the dough until it begins to hold its shape. Cover it and let it rise for about 1 hour, and then turn out onto a floured surface to knead and shape. Shape the dough by rolling it out on a flat surface and then rolling it up and placing it in a bread pan. Allow to rise until the dough is just over the top of the bread pan and then bake it and enjoy!
For the Visual Learner:
What your dough should look like with all the ingredients combined prior to kneading.
After a few minutes of kneading with a stand mixer, you will see the dough begin to wrap around itself. It is gaining structure and developing the gluten.
I like to transfer the dough to an oiled bowl for the first rise.
After an hour of rising, your dough should be (about) doubled in size.
Roll it out!
Roll it up!
Place into an oiled bread pan.
Let it rise until just over the top of the pan.
Bake it and enjoy!
This bread is a staple in our house. I make this recipe at least 2 times per week for my family! With two children under 2 requiring my attention at any given moment, I need it to be easy or it won’t get done. So when I say it’s easy, you better believe it!
I have gotten into my rhythm baking this whole wheat bread, and now it is about as natural to me as doing the dishes (maybe more so). Once, you bake a recipe like this enough times, you commit it to memory, and it becomes part of the flow in your kitchen. If you are discouraged in your kitchen and overwhelmed learning the skills of cooking and baking from scratch, I encourage you to just keep at it. Pick one thing to practice and get good at. When you master that, move onto the next thing! Trying to throw too many new things into your routine at once, will leave you feeling overwhelmed and burnt out. But, steady consistent effort in small areas at a time will increase your capacity and skill until what seemed impossible to master doesn’t even feel hard anymore!
What you need to know about the flour:
Feel free to experiment for yourself with different types of flour. I specifically use fresh milled hard red wheat flour for the directions I have given you with this recipe. However…get ready for these mouthfuls…I have also made this recipe with store bought hard red whole wheat flour; store bought golden whole wheat flour; and fresh milled hard white whole wheat flour.
You will find that you will have to make slight changes such as: adding flour, lessening the liquid, or adjusting the kneading times. However, the differences are minor, and if you follow this specific recipe with any of the above varieties, it will likely come out quite good regardless of any adjustments. I have found this particular bread recipe to be quite forgiving.
Using an “autolyse” with fresh milled flour:
After switching to fresh-milled flour, I found myself working with a sticky, sloppy dough on multiple occasions. I decided to try giving my dough a resting period to hydrate the flour before incorporating my yeast. This is called an “autolyse.” I’ll be honest, I resisted incorporating this step because it seemed like extra work, and my final products seemed to come out just fine without it. When I learned how to do this step properly, however, I found that it made my dough much easier to handle.
Simply add 3 cups of flour and 1 cup of water to your bowl or stand mixer, and mix the two together well. That is key. You want to knead the flour and the water until it is fully combined into a smooth dough ball. If not fully combined, I have found that I ended up with a clumpy dough that did not have a smooth elastic consistency. At this point, you can cover the dough under a damp towel and leave it to rest for about 30 minutes.
When you return, warm the milk in a liquid measuring cup to a lukewarm temperature, and add your yeast to it. Combine the honey, the yeast mixture, and the butter with the dough in the stand mixer, and incorporate it all together. It is easiest to do this by hand using a wooden spoon.
Add the salt last after the rest of the ingredients are beginning to form a shaggy dough. Add the remaining half a cup of flour one tablespoon at a time while kneading until the dough begins to become elastic. Knead in the stand mixer or by hand for about 10 minutes. At this point the dough will be very smooth and elastic, easy to handle, and should pass the window pane test.
100% whole wheat vs. All purpose flour:
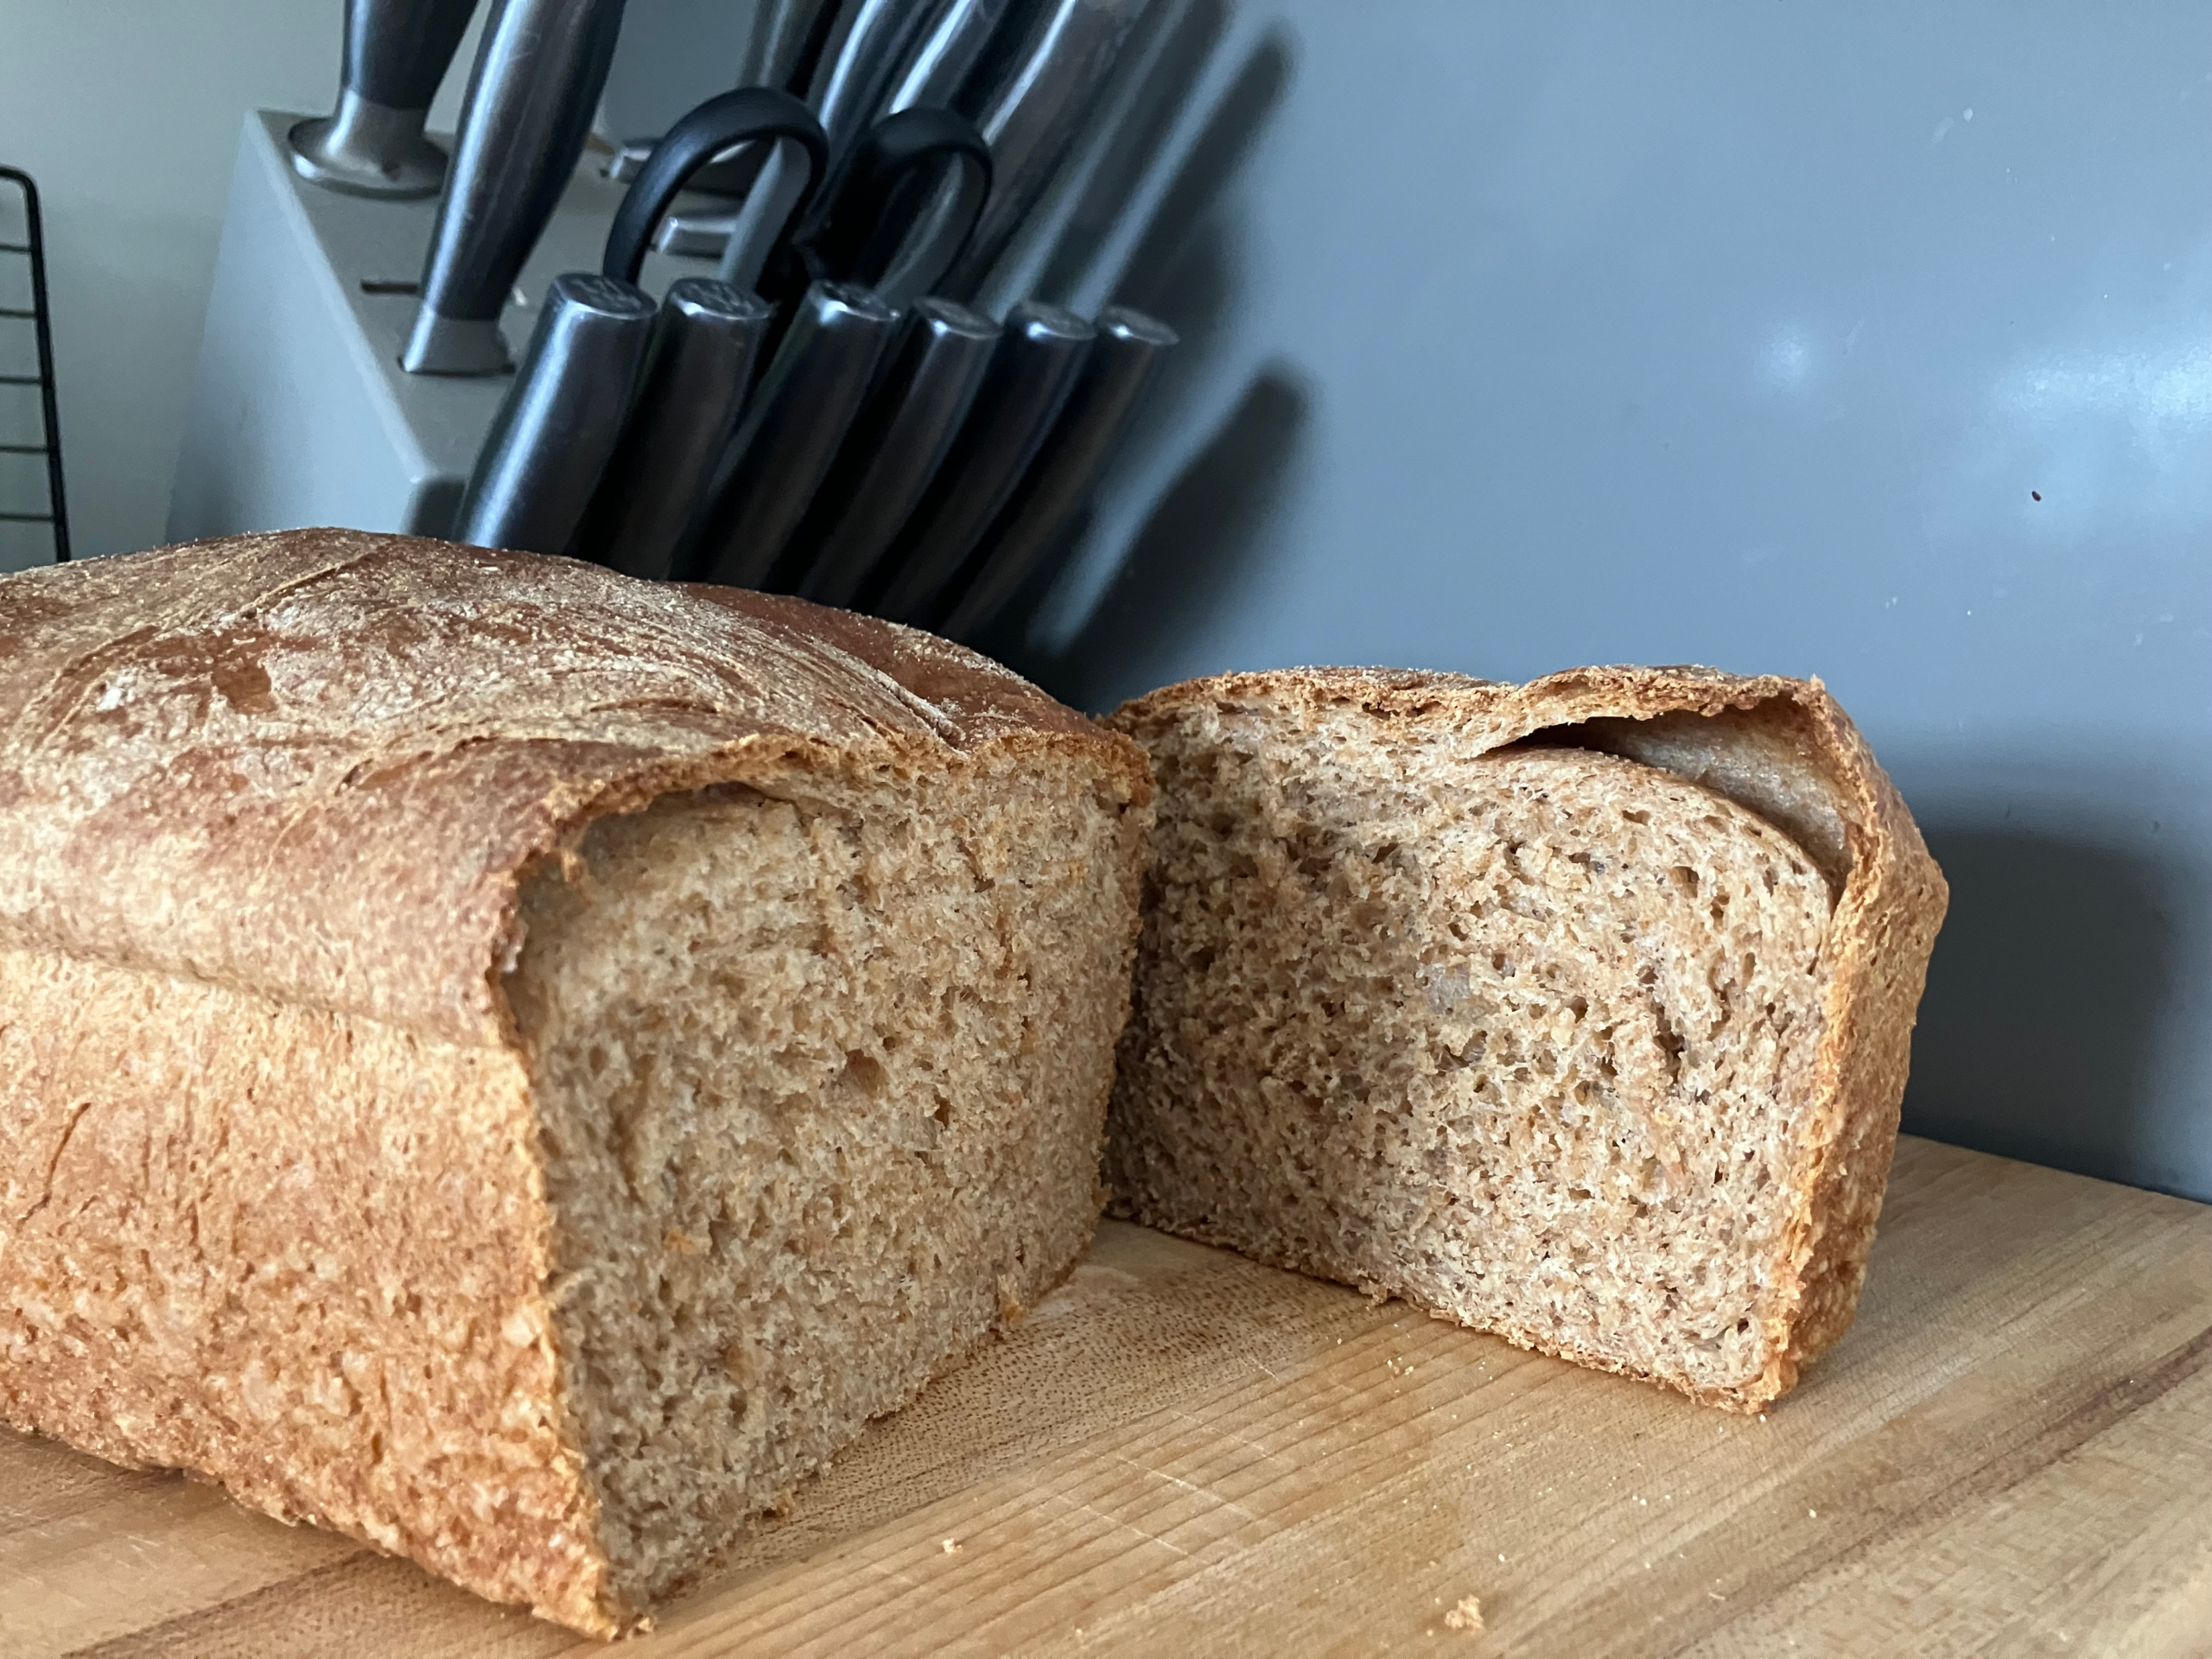
If you are new to baking with whole wheat flour, you can expect to notice a stark flavor and texture difference when you make the switch to 100% whole wheat flour. I immediately preferred the taste and texture of the whole wheat products over the all purpose breads I’d made before, as did my family, but I know that is not the case for everyone. This loaf will not come out quite as tall or fluffy as some all purpose sandwich breads will be. However, it is still great sandwich bread material. The bread has a hearty, robust flavor, but it is not dense. The different wheat that you use will change the flavor and texture of the bread.
This bread is forgiving!
Before figuring out my autolyse technique when switching to fresh-milled flour, my dough would be very difficult to work with! I could not get my dough to become truly elastic and pass the windowpane test. However, I would still get decent breads at the end of the process. Therefore, I dragged my feet on troubleshooting this issue.
If your dough looks like this, continue the process and bake it anyway! You may be surprised at how it comes out, and if nothing else, you can turn your bread into croutons or breadcrumbs if it is truly not enjoyable!
Shaggy dough with all ingredients prior to kneading.
After kneading when the dough is extra wet, resist the urge to just keep adding flour. Allow it to rise even if it is not getting elastic, and instead use a little more flour and wet hands during the shaping process to get it into a loaf pan.
Another common mistake I make is: I have often allowed this bread to over-rise while in the loaf pan. I discovered that doing so would cause the bread to be too soft and airy for good sandwich bread. However, it can still be used for sandwhiches and is delicious for toast or peanut butter bread if you make this mistake. So do not be afraid of messing up!
Try this super easy recipe for homemade whole wheat sandwich bread. This bread comes out so delicious, soft, and great for sandwiches or toast.
Ingredients
3.5 Cups whole wheat flour
1 cup water
1/2 cup milk
2.5 Tsp Yeast
3 Tbsp Honey
1.5 teaspoons of salt
3 Tbsp softened butter.
Directions
Combine water and milk and warm to room temperature. Add the yeast.
Mix the yeast mixture with the honey in a stand mixer or a bowl, and add 3 cups of the flour and salt. *see note below regarding the first two steps.*
Divide the softened(not melted) butter into chunks and add to the dough.
Knead on low or by hand for 8-10 minutes adding a tablespoon of flour at a time as needed. Then transfer to an oiled bowl and let rise for 1 hour or until doubled in size.
Turn the dough out onto a floured surface, and knead for 1 to 2 minutes as needed to get the dough workable. You can add more flour at this point if needed, but don’t overdo it.
Roll the dough out and shape it to fit in a loaf pan. Let rise for 30-45 minutes.
Bake the loaf in a 375 degree oven for 35-40 minutes, or until golden brown and a knife inserted comes out clean.
Notes
If using fresh milled flour, I have found that letting the dough have a resting period to hydrate prior to mixing the rest of the ingredients helps to form a more elastic dough. Follow the instructions in this section in place of the first two steps to use this technique.
I use my kitchen aid to streamline the process of baking this bread. The machine makes this recipe a breeze! However, I did not want to discourage any readers who may not have a mixer from giving this recipe a try! A bowl and spoon will work just as well!
Step 6 is crucial. The only way I have ever drastically messed up this loaf is by not rolling out the dough, and instead placing it directly into a loaf pan. Your bread may rise nicely but will have no shape, and will sink in the oven when baking. In order to have a loaf of bread that holds its shape, I have found with most any breads, the best practice is to roll it flat and then roll it up to fit in the bread pans.
If you tried this recipe, please let me know what you thought! You can leave a comment, and follow me on Pinterest for more encouragement and family friendly, homecooked meals for the mom that does not like to cook!


Leave a Reply